Sunday 31 July 2016

Bottom Bracket & Crank Upgrade, Chain Extension

Here i will provide the other information that is missing...What is the size of the Crank Arm Fixing Bolt?

For now, read on!


Parts upgraded in this page

  1. Bottom Bracket Upgrade
  2. Crank Upgrade
  3. Chain Extension


Bottom Bracket Upgrade

This Bottom Bracket is ordered from Chain reactions UK, including postage it costs £18.99
It arrived in about 3 weeks.

Well, i did it because the Pound vs SGD was low at 1.79

I chose to use square taper ones because it is available cheaply compared to hollowtech ones where more parts are available on the second hand market.


The crank arms have to be removed to measure the end to end length of this new bracket.
For the Tahara, it is Dia 68 x L118 mm British thread.

http://www.chainreactioncycles.com/sg/en/shimano-un55-square-taper-bottom-bracket/rp-prod71369

Measure your existing crank length 'L' (See below)


Installation

To install, you would need 2 tools
a. Crank puller for S$3.45
b. Bottom bracket tool for S$3.10

Both can be bought cheaply and even cheaper than carousell.
From Ebay, these are sold from Hong Kong / China and price includes postage to Singapore.


Of course you will need a 14mm box spanner to remove the old crank and bottom bracket.

Here comes the important info that i mentioned above.

What is the size of the crank arm fixing bolt Y15507000?

Its M8 x 1.0 x L25mm
To use the L25, flat washers and spring washers would be needed else the bolt would be too long.

Bolt shops sell the high tensile ones for $1 each.

Remember to grease the threads before installation to prevent rust and seizure over time.

Crank Upgrade


Upgrade crank from 42T to 52T


Chain Extension

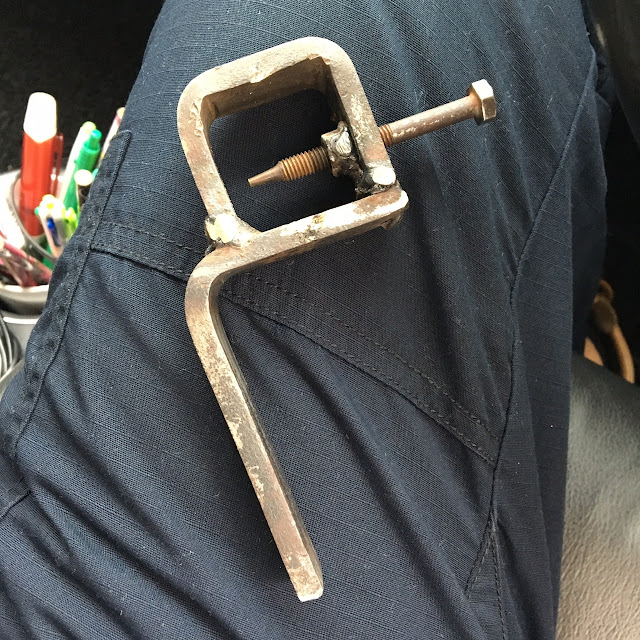
The upgrade of the crank needed the chain to be longer. Hence i joint the KMC chains with the stock chain and trim to required length. Joining with the KMC missing links. I could do so only because they are the same thickness. The excess chains are trimmed off with my DIY chain breaker.

Diy Chain breaker (DIY)


Folding Stem Upgrade - Version 2

Version 2 Upgrade

This second upgrade came about when i found a second hand folding stem.
An adapter is needed for holding the fork in order for the new stem to be used.

This used folding stem costs $30

I like it because it is rigid enough to prevent unnecessary flexing.


Here's the Quill Stem Adapter that was fabricated along with an extended cap screw.
Its made of 304 stainless steel. Costs $9 exclude fabrication which is my own.


(Above) The quill stem is a bit 'too heavy duty'. I could have removed more material to make its weight lighter.


Th quill stem can be purchased but the joy comes from DIY.


From this DIY, I made a collar on the quill stem to prevent the stem from slipping through.


At this point, I lack a handle bar for the complete set up.

Folding Stem Upgrade - Version 1

Here is the stock stem.

It has a folded collar. After repeated flexing, the thin metal gives way and bends.
The locking mechanism is also crappy.


Version 1 Upgrade

Here is the first mod by cutting away the bottom pipe which is used to secure the stem to the fork by friction angled nut. Two flanges are brazed onto the existing telescopic pipe and stainless steel cap nut is used for securing them together.


(Above) Top handle


(Above) Lower stem


The disadvantage is having to keep an allen key around to remove the cap screws in order to separate the stem when folded.


My first folding bike

This is the folding bike i bought used for $50.
Quite a steal. Retail price was about $155.

20" wheels.
Features a 6 speed grip shift.
The weight is 12.4 kg

Made in China.

The only issue i have with this is the folding stem which became quite loose after repeated usage by the previous owner.


The following photos are from the web which is similar setup